To reset existing (Oracle) Sequence.

#Set the value of variable cnt_fx to reset the Oracle Sequence.
#Replace owner and SEQUENCE_name with your schema owner and Sequence name.
Login to Database and execute below SQLs:

set serveroutput on

declare
cnt integer;
— Target sequence number#
— change the number that you want reset or set.

cnt_fx integer :=701;
cnt_final integer;

begin
select owner.SEQUENCE_name.nextval into cnt from dual;
select owner.SEQUENCE_name.currval into cnt from dual;
cnt_final := cnt_fx – cnt;
dbms_output.put_line(cnt_final);
execute immediate ‘alter sequence owner.SEQUENCE_name increment by ‘ ||  cnt_final;
select owner.SEQUENCE_name.nextval into cnt from dual;
dbms_output.put_line(cnt);
execute immediate ‘alter sequence owner.SEQUENCE_name increment by 1’;
end;
/
To see updated Sequence number :

select owner.SEQUENCE_name.currval  from dual;

Posted in Shell Script | Tagged | 9 Comments

Step by Step Install of Grid Control 11g R2 on AIX UNIX

Step 1 # Installation the Oracle 11g2 Database binaries.

Step 2 # Creation of the database for OEM repository.

Please update the follow init parameters’ value at OMS database:

SQL> alter system set session_cached_cursors=500 scope=spfile;
System altered.

SQL> alter system set processes=1000 scope=spfile;
System altered.

SQL> ALTER DATABASE DATAFILE ‘/omsq1/oracle/dbdata/omsq1/undotbs01.dbf’ RESIZE 500M;
Database altered.

Step 3 # Creating of the Oracle Middleware Home and Installation of Oracle WebLogic Server.
If you are installing WebLogic Server on a 64-bit platform using a .jar installation program:

#./java -d64 -jar wls1032_generic.jar

Step 4 # To Install OEM Grid Server 11g2 s/w

.#/runInstaller
*******************************************************************************
Your platform requires the root user to perform certain pre-installation OS preparation.  The root user should run the shell script ‘rootpre.sh’ before you proceed with Oracle installation.  rootpre.sh can be found at the top level of the CD or the stage area.
Answer ‘y’ if root has run ‘rootpre.sh’ so you can proceed with Oracle installation.
Answer ‘n’ to abort installation and then ask root to run ‘rootpre.sh’.
****************************************************************************** 
Has ‘rootpre.sh’ been run by root? [y/n] (n)
y
Starting Oracle Universal Installer…
Checking Temp space: must be greater than 190 MB.   Actual 1959 MB    Passed
Checking swap space: must be greater than 150 MB.   Actual 8192 MB    Passed
Checking monitor: must be configured to display at least 256 colors.    Actual 16777216    Pas
Preparing to launch Oracle Universal Installer from /tmp/OraInstall2011-02-28_02-16-50PM.


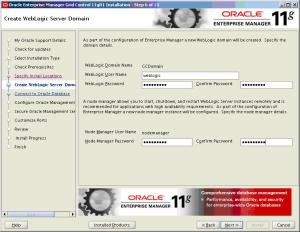
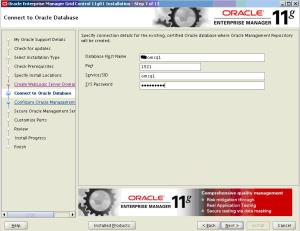
Select the option “Install a new Enterprise Manager System”

Select path / Home of Weblogic for “Oracle Middleware Home location”
Select OMS Oracle Database home location  for “OMS Instance base location”


This information is also available at:
            /omsq1/oracle/product/Middleware/oms11g/install/setupinfo.txt
See below for information pertaining to your Enterprise Manager installation:
Use the following URL to access:
            1.EnterpriseManager Grid Control URL: https://p40:7799/em
            2. Admin Server URL: https://p40:7101/console
The following details need to be provided during the additional OMS install:
            1. Admin Server Hostname: tp40
            2.AdminServerPort: 7101
 NOTE:
 An encryption key has been generated to encrypt sensitive data in the Management Repository. If this key is lost, all encrypted data in the Repository becomes unusable. Please run following command to backup the Management Service configuration including the emkey and keep the backup on another system:
 emctl exportconfig oms -dir <backup location>

Posted in GIRD OEM | Tagged | 1 Comment

Step by step for Oracle 11g Database Replay feature

Step by step for Oracle 11g2 Database Replay feature 
 
Create Tablespace “USERS”  
 
SQL>CREATE TABLESpace users DATAFILE ‘/u01/oracle/dbdata/tstd11s/data/user01.dbf’ size 500m autoextend on maxsize 1g; 
 
Create DIRECTORY to store Replay related files. 
 
SQL>CREATE OR REPLACE DIRECTORY dbreplay_capture_dir AS ‘/u01/oracle/dbdata/dbreplay_capture/’; 
 
Start Capture process 
 
SQL>
BEGIN
  DBMS_WORKLOAD_CAPTURE.start_capture (name     => ‘tst_capture_7’,
 
                                       dir
      => ‘dbreplay_CAPTURE_DIR’,
                                       duration => NULL);
END;

 
These below activities will be capture in replay process
 
SQL>CREATE USER dbreplay_test IDENTIFIED BY dbreplay_test
  QUOTA UNLIMITED ON users;
SQL>GRANT CONNECT, CREATE TABLE TO dbreplay_test;
SQL>CONN dbreplay_test/dbreplay_test 
 
SQL>CREATE TABLE dbreplay_test_tab (
  id
           NUMBER,
  description
  VARCHAR2(50),
  CONSTRAINT dbreplay_test_tab_pk PRIMARY KEY (id)
) tablespace users; 
 
SQL>
BEGIN
  FOR i IN 1 .. 100000 LOOP
    INSERT INTO dbreplay_test_tab (id, description)
    VALUES (i, ‘Description for ‘ || i);
  END
LOOP;
  COMMIT;
END;

To stop the replay process
 
SQL>CONN / AS SYSDBA
SQL>
BEGIN
  DBMS_WORKLOAD_CAPTURE.finish_capture;
END;


To find a Capture ID, Name 
 SQL>conn / as sysdba
SQL> SELECT DBMS_WORKLOAD_CAPTURE.get_capture_info(‘dbreplay_CAPTURE_DIR’)
FROM
   dual;
DBMS_WORKLOAD_CAPTURE.GET_CAPTURE_INFO(‘dbreplay_CAPTURE_DIR’)
—————————————————————
                                                             8
 
SQL> COLUMN name FORMAT A30
SELECT id, name FROM dba_workload_captures;
         8 tst_capture_7 
      
 
To get report
 
DECLARE
  l_report
  CLOB;
BEGIN
  l_report := DBMS_WORKLOAD_CAPTURE.report(capture_id => 8,format
     => DBMS_WORKLOAD_CAPTURE.TYPE_HTML);
END;

To export the replay work
 
BEGIN
  DBMS_WORKLOAD_CAPTURE.export_awr (capture_id => 8);
END;

 
— At Test Database —– 
 
To create tablespace “USER” 
 
SQL>CREATE TABLESpace users DATAFILE ‘/u01/oracle/dbdata/dbat01/data/dbat01_user01.dbf’ size 500m autoextend on maxsize 1g; 
 
Create DIRECTORY to copy replay files
 
SQL>CREATE OR REPLACE DIRECTORY dbreplay_capture_dir AS ‘/u01/oracle/dbdata/dbreplay_capture/’; 
 
To initial and prepare
SQL>
BEGIN
  DBMS_WORKLOAD_REPLAY.process_capture(‘dbreplay_CAPTURE_DIR’); 
   DBMS_WORKLOAD_REPLAY.initialize_replay (replay_name => ‘tst_capture_7’,
                                          replay_dir
  => ‘dbreplay_CAPTURE_DIR’); 
   DBMS_WORKLOAD_REPLAY.prepare_replay (synchronization => TRUE);
END;

 
To calibrate the replay  
 
#wrc mode=calibrate replaydir=/u01/oracle/dbdata/dbreplay_capture

Workload Replay Client: Release 11.2.0.1.0 – Production on Tue Jan 18 15:43:05 2011
Copyright (c) 1982, 2009, Oracle and/or its affiliates.  All rights reserved.
Report for Workload in: /u01/oracle/dbdata/dbreplay_capture
———————–
Recommendation:
Consider using at least 1 clients divided among 1 CPU(s)
You will need at least 3 MB of memory per client process.
If your machine(s) cannot match that number, consider using more clients.
Workload Characteristics:
– max concurrency: 1 sessions
– total number of sessions: 5
 
Assumptions:
– 1 client process per 50 concurrent sessions
– 4 client process per CPU
– 256 KB of memory cache per concurrent session
– think time scale = 100
– connect time scale = 100
– synchronization = TRUE
 
/u01/oracle/dbdata/dbreplay_capture/cap 
  
To Start Replay process at Test Database
 
#wrc system/xxxx@dbat01  mode=replay replaydir=/u01/oracle/dbdata/dbreplay_capture
 
Workload Replay Client: Release 11.2.0.1.0 – Production on Tue Jan 18 16:02:48 2011
Copyright (c) 1982, 2009, Oracle and/or its affiliates.  All rights reserved.
 
Wait for the replay to start (16:02:51)
……. 
 
Open another new session at test Database
————-
Enter user-name: / as sysdba
Connected to:
Oracle Database 11g Enterprise Edition Release 11.2.0.1.0 – 64bit Production
With the Partitioning, OLAP, Data Mining and Real Application Testing options
 
SQL>
BEGIN
  DBMS_WORKLOAD_REPLAY.start_replay;
END;
/
 
PL/SQL procedure successfully completed.
————–
Back to 1st session at test Database
 
…….
Wait for the replay to start (16:02:51)
 
Replay started (16:33:26)
 
Replay finished (17:10:39) 
  
To check replay work at test enviroment  
 
SQL> CONN sys/password@test AS SYSDBA
Connected.
SQL> SELECT table_name FROM dba_tables WHERE owner = ‘dbreplay_TEST’;
 
TABLE_NAME
——————————
dbreplay_TEST_TAB
 
SQL> SELECT COUNT(*) FROM dbreplay_test.dbreplay_test_tab;
 
  COUNT(*)
———-
    100000
 
 
SQL> set pagesize 0 long 30000000 longchunksize 3000
SQL> set line 2000
SQL> select dbms_workload_replay.report(8,’TEXT’) from dual;
 
DB Replay Report for test_capture_8
—————————————————————————
| DB Name | DB Id
     | Release    | RAC | Replay Name
    | Replay Status |
—————————————————————————
| DBAT01
  | 313434807 | 11.2.0.1.0 | NO  | test_capture_3 | COMPLETED
     |
—————————————————————————
 
Replay Information
——————————————————————————————-|
   Information    | Replay                               | Capture
                              |
——————————————————————————————-| Name
             | test_capture_3                       | test_capture_3
                       |
——————————————————————————————-| Status
           | COMPLETED                            | COMPLETED
                            |
——————————————————————————————-| Database Name
    | DBAT01                               | tstd11s
                              |
——————————————————————————————-| Database Version | 11.2.0.1.0
                           | 11.2.0.1.0
                           |
——————————————————————————————-| Start Time
       | 18-01-11 21:33:26                    | 18-01-11 15:46:02
                    |
——————————————————————————————-| End Time
         | 18-01-11 22:07:49                    | 18-01-11 16:20:29
                    |
——————————————————————————————-| Duration
         | 34 minutes 23 seconds                | 34 minutes 27 seconds
                |
——————————————————————————————-| Directory Object | dbreplay_CAPTURE_DIR
                | dbreplay_CAPTURE_DIR
                |
————————————————————————————————–
| Directory Path
   | /u01/oracle/dbdata/dbreplay_ca | /u01/oracle/dbdata/db_replay_ca |
|
                  | pture/                               | pture/
                               |
————————————————————————————————–
 
Replay Options
———————————————————
|
       Option Name       | Value
                       |
———————————————————
| Synchronization
         | SCN
                         |
———————————————————
| Connect Time
            | 100%
                        |
———————————————————
| Think Time
              | 100%
                        |
———————————————————
| Think Time Auto Correct | TRUE
                       |
———————————————————
| Number of WRC Clients
   | 1 (1 Completed, 0 Running ) |
———————————————————
 
Replay Statistics
—————————————————————
|
        Statistic        | Replay           | Capture
        |
—————————————————————
| DB Time
                 |
   76.383 seconds | 56.847 seconds |
—————————————————————
| Average Active Sessions |
              .04 |
            .03 |
—————————————————————
| User calls
              |               95 |
             95 |
—————————————————————
| Network Time
            |    1.101 seconds | .
              |
—————————————————————
| Think Time
              | 1992.558 seconds | .
              |
—————————————————————
 
Replay Divergence Summary
——————————————————————-
|
                Divergence Type
                | Count | % Total |
——————————————————————-
| Session Failures During Replay
                |     0 |
    0.00 |
——————————————————————-
| Errors No Longer Seen During Replay
           |     0 |
    0.00 |
——————————————————————-
| New Errors Seen During Replay
                 |     0 |
    0.00 |
——————————————————————-
| Errors Mutated During Replay
                  |     1 |
    1.05 |
——————————————————————-
| DMLs with Different Number of Rows Modified
   |     0 |
    0.00 |
——————————————————————-
| SELECTs with Different Number of Rows Fetched |
     4 |
    4.21 |
——————————————————————-
 
——————————————————————————————-Workload Profile Top Events
————————————————–
| No data exists for this section of the report. |
————————————————–
Top Service/Module/Action
————————————————–
| No data exists for this section of the report. |
————————————————–
Top SQL with Top Events
————————————————–
| No data exists for this section of the report. |
————————————————–
Top Sessions with Top Events
————————————————–
| No data exists for this section of the report. |
————————————————–
Replay Divergence Session Failures By Application
————————————————–
| No data exists for this section of the report. |
————————————————–
Error Divergence By Application
——————————————————————————————-| Service
   | Module    | Action    | Capture   | Replay
    | Count | First Occ | Last Occu |
| Name
      | Name      | Name      | Error     | Error     |       | urrence   | rrence
    |
——————————————————————————————- SYS$USERS | SQL*Plus
  | UNNAMED   | ORA-00904 | ORA-15566 | 1
     | 2011-01-1 | 2011-01-1 |
|
           |           |           |           |           |
       | 8T16:38:0 | 8T16:38:0 |
|
           |           |           |           |           |
       | 5.689633- | 5.689633- |
|
           |           |           |           |           |       | 05:00     | 05:00
     |
——————————————————————————————-
By SQL
————————————————–
| No data exists for this section of the report. |
————————————————–
By Session
——————————————————————————————-
| Session ID | Session
      | Capture      | Replay Error | Count | First        | Last
         |
|
            | Serial       | Error        |              |       | Occurrence   | Occurrence
   |
——————————————————————————————-
| 34
         | 293          | ORA-00904    | ORA-15566    | 1
     | 2011-01-18T1 | 2011-01-18T1 |
|
            |              |              |              |
       | 6:38:05.6896 | 6:38:05.6896 |
|
            |              |              |              |       | 33-05:00     | 33-05:00
     |
——————————————————————————————-DML Data Divergence By Application
————————————————–
| No data exists for this section of the report. |
————————————————–
By SQL
————————————————–
| No data exists for this section of the report. |
————————————————–
By Divergence magnitude
————————————————–
| No data exists for this section of the report. |
————————————————–
SELECT Data Divergence By Application
——————————————————————————————-| Service
  | Module   | Action   | Avg Rows | Avg      | Number
   | Count | First Oc | Last Occ |
| Name
     | Name     | Name     | Affected | Absolute | of       |       | currence | urrence
  |
|
          |          |          |          | Rows     | Distinct |       |          |
          |
|
          |          |          |          | Affected | Sessions |       |          |
          |
——————————————————————————————-| SYS$USER | sqlplus@ | UNNAMED
  | -3       | 3        | 2        | 4
     | 2011-01- | 2011-01- |
| S
        | artp6    |          |          |          |          |
       | 18T16:38 | 18T16:56 |
|
          | (TNS     |          |          |          |          |
       | :48.0546 | :08.9631 |
|
         | V1-V3)   |          |          |          |          |
       | 23-05:00 | 96-05:00 |
——————————————————————————————-By Divergence magnitude
——————————————————————
| Max divergence magnitude | Divergence distribution (%) | Count |
——————————————————————
| no rows affected
         | 100                         | 4
     |
——————————————————————
Replay Clients Alerts
————————————————–
| No data exists for this section of the report. |
————————————————–
Replay Filters
————————————————–
| No data exists for this section of the report. |
————————————————–
 
End of Report. 
 

Posted in Oracle 11g2 | Tagged | 1 Comment

Recover Gaps in Standby Database from primary Using incremental backups

Recovering a Standby database from a missing archives log

Recover Gaps in Standby Database from primary Using incremental backups

A Physical Standby database synchs with Primary by continuous apply of archivelogs from a Primary Database. In case of an archivelog gone missing or corrupt you have to rebuild the standby database from scratch but in 10g, an incremental backup created with BACKUP INCREMENTAL… FROM SCN can be used to refresh the standby database with changes at the primary database since the last SCN at Standby and then managed recovery can resume i.e. Compensate for the missing archivelogs
Step 1: On the standby database find out the current SCN.

standby > select current_scn from v$database;

CURRENT_SCN
———–
2757142742

Step 2: On the primary database, create an incremental backup from the above SCN

#rman target /

RMAN>
BACKUP as compressed backupset device type disk INCREMENTAL fROM SCN 2757142742 DATABASE FORMAT ‘/oracle/backups/priv1/rmanbackup/manual/forstandby_%U’ tag ‘FOR STANDBY’;

Step 3: Cancel managed recovery at the standby database

STDBY>alter database recover managed standby database cancel;
Media recovery complete.

scp the backup files to standby server to /oracle/backups/priv2/rmanbackup/manual/ folder.

Step 4: Catalog the Incremental Backup Files at the Standby Database

#rman target /

RMAN> CATALOG START WITH ‘/oracle/backups/priv1/rmanbackup/manual/’;

searching for all files that match the pattern /oracle/backups/priv1/rmanbackup/manual/

List of Files Unknown to the Database
=====================================
……

Do you really want to catalog the above files (enter YES or NO)? YES
cataloging files…
cataloging done

Step 5: Apply the Incremental Backup to the Standby Database

RMAN> recover database noredo;

Step 6: Put the standby database back to managed recovery mode.

STDBY>> recover managed standby database disconnect;
Media recovery complete.

From the alert.log you will notice that the standby database is still looking for the old log files

*************************************************
FAL[client]: Failed to request gap sequence
GAP – thread 1 sequence ….

DBID 23623369570 branch 704397469

FAL[client]: All defined FAL servers have been attempted.

**************************************************

This is because the controlfile has not been updated.
Hence the standby controlfile has to be recreated

Step 7:  At Primary .. Create latest control file for standby database

RMAN> backup device type disk current controlfile for standby format ‘/oracle/backups/test1/rmanbackup/manual/forstandbyctrl.bck’;

Step 8: At Standby … Create a backup (text copy) of control file (to find out the actual location of data files)

SQL> alter database backup controlfile to trace;

Step 9: At Standby …

SQL> shutdown immediate;

SQL> startup nomount;

RMAN> restore standby controlfile from ‘/oracle/backups/test1/rmanbackup/manual/forstandbyctrl.bck’;

Step 10 : At Standby …

Create standby Redo log file

For example ( check out for location , group number and size )

alter database add standby logfile thread  1 group x ‘redo log location’ size mb;

alter database add standby logfile thread  1 group 5 ‘/oracle/oradata01/test1/redo05.log’ size 52428800;

alter database add standby logfile thread  1 group 6 ‘/oracle/oradata01/test1/redo06.log’ size 52428800;

Step 11: At Standby …

If there is mismatch in location of data files between primary and standby, need to update control file, follow these steps

Sql>Alter system set standby_file_management=manual;

Sql> alter database recover managed standby database cancel;

Sql>Shutdown immediate;

Sql>Startup mount

Sql>Alter database rename datafile  ‘primary data file location’ to ‘standby datafile location’;

For example:

SQL>alter database rename file ‘/oracle/oradata02/test2/data/app_data05.dbf’ to ‘/oracle/oradata/test1/data/lob/app_data05.dbf’;

Sql>alter system set standby_file_management=auto;

Sql>Shutdown immediate

Sql>Startup mount

Sql>recover managed standby database disconnect;

Step 12:

Verify the standby alert log file, after couple of switch logfile at primary:

SQL> alter system switch logfile;

Posted in Data Guard | Tagged | 1 Comment

Completion time of RMAN / Data Pump

Sometime , we want to know how long RMAN or DATA PUMP export / import will take. Here are the sample SQLs to get to know:
Note: PER_DONE — So far work done in %

For RMAN:

SQL>alter session set nls_date_format=’dd/mm/yy hh24:mi:ss’;
SQL>select sid, totalwork, sofar, (sofar/totalwork) * 100 per_done,start_time, sysdate + time_remaining/3600/24 end_at
from v$session_longops
where totalwork > sofar
and lower(opname) not like ‘%aggregate%’
and lower(opname) like ‘rman%’;

SID START_TIME         TOTALWORK      SOFAR       PER_DONE END_AT
—– —————– ———- ———- ———- —————– —————–
491 18/08/10 20:13:45                   1213440    1165439   96.04   18/08/10 20:18:06
480 18/08/10 20:14:42                    486816     172329     35.39    18/08/10 20:23:50

For Export:
SQL>alter session set nls_date_format=’dd/mm/yy hh24:mi:ss’;
SQL>select sid, totalwork, sofar, round((sofar/totalwork) * 100) done,start_time,sysdate + time_remaining/3600/24 end_at
from v$session_longops
where totalwork > sofar
and upper(message) like ‘%EXPORT%’;

SID START_TIME         TOTALWORK      SOFAR       PER_DONE END_AT
———- —————– ———- ———- ———- —————–
—————–
113 18/08/10 21:03:48                  3864        892            23.08    18/08/10 21:33:21

For Import:

SQL>alter session set nls_date_format=’dd/mm/yy hh24:mi:ss’;
SQL>select sid, totalwork, sofar, round((sofar/totalwork) * 100) per_done,start_time,sysdate + time_remaining/3600/24 end_at
from v$session_longops
where totalwork > sofar
and upper(message) like ‘%IMPORT%’;

SID START_TIME         TOTALWORK      SOFAR   PER_DONE END_AT
———- —————– ———- ———- ———- —————– —————–
121 19/08/10 11:02:54                3004            532       17.70 19/08/10 11:33:05

Posted in SQL Script | Tagged | Leave a comment

Environment setup at Oracle RAC Database Server on Linux o/s (oraenv)

I have a RAC database named “TEST”, with instances TEST1 and TEST2. The default entry in the oratab looks something like this:
TEST:/u01/app/oracle/product/11.2.0/dbhome_1:N

[oracle@oscqadb02 ~]$ . oraenv
ORACLE_SID = [QAERIE1] ? TEST — sets the *home* correctly, but does not set the instance.

I have to do it manually

#export ORACLE_SID=TEST1

The below alias does not work because main folder depends upon database name not the instance name

alias alog=’/bin/vi $ORACLE_BASE/admin/$ORACLE_SID/bdump/alert_$ORACLE_SID.log’

Here is the workaround:

Login as root

Copy the existing oraenv file to oraenvrac (whatever name) and change the owner of this file.

For example:

[root@oscqadb02 oracle]# cp /usr/local/bin/oraenv /usr/local/bin/oraenvrac

[root@oscqadb02 oracle]# chown oracle /usr/local/bin/oraenvrac

oracle@oscqadb02 ~]$ ll /usr/local/bin/oraenvrac
-rwxr-xr-x 1 oracle root 3094 Aug 18 14:14 /usr/local/bin/oraenvrac

Add the below lines at bottom of the oraenvrac file:

#To get database name:

export DB_NAME=$ORACLE_SID

#To get instance number:

len=`hostname
wc -c`
len1=`expr $len – 1`
nodenum=`hostname
cut -c$len1-$len`

#To get instance name:

export ORACLE_SID=$ORACLE_SID$nodenum

You can use following alias for view and tail the alert.log file

alias alog=’/bin/vi $ORACLE_BASE/admin/$DB_NAME/bdump/alert_$ORACLE_SID.log’

alias alogt=’/bin/tail -f $ORACLE_BASE/admin/$DB_NAME/bdump/alert_$ORACLE_SID.log’

# [oracle@oscqadb02 ~]$. oraenvrac
ORACLE_SID = [ABC2] ? TEST
[oracle@oscqadb02 ~]$ sid
TEST2
[oracle@oscqadb02~]

You are all set now.

Posted in Uncategorized | Tagged , , | 1 Comment

Manually upgrade the Database 10g2 (10.2.0.4) to Oracle database 11g2 on Redhat Linux 5

1. Run utlrp.sql to recompile any remaining stored PL/SQL and Java code.

SQL> @utlrp.sql

2. Check dba_registry

column comp_name format a40
set pagesize 50
set line 2000
select trim(comp_name) comp_name , version , status from dba_registry;

3. Verify that all expected packages and classes are valid:

SQL> select count(*) from dba_objects where status <>’VALID’;
SQL>select owner,object_type,count(*) from dba_objects where status <>’VALID’ group by owner,object_type order by 1,2;

4. Backup the database.


5. Analyze the existing instance using the

SQL>@$ORACLE_11G_HOME/rdbms/admin/utlu112i.sql script

6. Shut down the instance:

SQL> SHUTDOWN IMMEDIATE

7. If your operating system is Linux or UNIX, then make the following checks:

a. The oratab file points to your Oracle Database 11g Rel. 2 Oracle home.
b. Your ORACLE_SID is set correctly
c. The following environment variables point to the Oracle Database 11g2 directories:
– ORACLE_HOME
– PATH
d. Any scripts that clients use to set the ORACLE_HOME value must point to the New Oracle home.
Note: If you are upgrading a cluster database, then perform these checks on all nodes in which this cluster database has instances configured.

8. Log in to the system as the owner of the Oracle Database 11g Release 2 (11.2)

Oracle home directory. At a system prompt, change to the $ORACLE_HOME/rdbms/admin directory.

9. Copy init or spfile file to 11g ORACLE_HOME.


10. Connect to the database instance as a user with SYSDBA privileges.

Start the instance by issuing the following command:

SQL> STARTUP UPGRADE

11. Set the system to spool results to a log file for later verification of success:

SQL> SPOOL upgrade.log

12. Run the catupgrd.sql script:

SQL> @catupgrd.sql This scripts runs the desired upgrade scripts and Shuts Down the database.

13. Restart the instance to reinitialize the system parameters for normal operation.

SQL> STARTUP

14. Run utlu112s.sql to display the results of the upgrade:

SQL> @$ORACLE_HOME/rdbms/admin/utlu112s.sql

15. (Optional ) Run catuppst.sql, located in the ORACLE_HOME/rdbms/admin directory, to
perform upgrade actions that do not require the database to be in UPGRADE mode:

SQL> @rdbms/admin/catuppst.sql

16. Run utlrp.sql to recompile any remaining stored PL/SQL and Java code.

SQL> @utlrp.sql

17. Verify that all expected packages and classes are valid:

SQL> SELECT count(*) FROM dba_invalid_objects;
SQL> SELECT distinct object_name FROM dba_invalid_objects;

18. Exit SQL* Plus

Posted in manual upgrade oracle database 11g2 | Tagged , , | 1 Comment

Manually upgrade the Database 10g2 (10.2.0.4) to Oracle database 11g2 on Redhat Linux 5

  1. Run utlrp.sql to recompile any remaining stored PL/SQL and Java code.

SQL> @utlrp.sql

 2.     Check dba_registry

column comp_name format a40
set pagesize 50
set line 2000
select trim(comp_name) comp_name , version , status from dba_registry;

3. Verify that all expected packages and classes are valid:

SQL> select count(*) from dba_objects  where status <>’VALID’;
SQL>select owner,object_type,count(*) from dba_objects  where status <>’VALID’ group by owner,object_type order by 1,2;

 4. Backup the database.

5. Analyze the existing instance using the

SQL>@$ORACLE_11G_HOME/rdbms/admin/utlu112i.sql  script

6. Shut down the instance:

SQL> SHUTDOWN IMMEDIATE

 7. If your operating system is Linux or UNIX, then make the following checks:

a. The oratab file points to your Oracle Database 11g Rel. 2 Oracle home.

b. Your ORACLE_SID is set correctly

c. The following environment variables point to the Oracle Database 11g2 directories:

– ORACLE_HOME

– PATH

d. Any scripts that clients use to set the ORACLE_HOME value must point to the New Oracle home.

Note: If you are upgrading a cluster database, then perform these checks on all nodes in which this cluster database has instances configured.


8. Log in to the system as the owner of the Oracle Database 11g Release 2 (11.2)

Oracle home directory.  At a system prompt, change to the $ORACLE_HOME/rdbms/admin directory.

 9. Copy init or spfile file to 11g ORACLE_HOME.

10. Connect to the database instance as a user with SYSDBA privileges. 

Start the instance by issuing the following command:

SQL> STARTUP UPGRADE

11. Set the system to spool results to a log file for later verification of success:

SQL> SPOOL upgrade.log

 12. Run the catupgrd.sql script:

SQL> @catupgrd.sql This scripts runs the desired upgrade scripts and Shuts Down the database.

 13. Restart the instance to reinitialize the system parameters for normal operation.

SQL> STARTUP

 14. Run utlu112s.sql to display the results of the upgrade:

SQL> @$ORACLE_HOME/rdbms/admin/utlu112s.sql

 15. (Optional ) Run catuppst.sql, located in the ORACLE_HOME/rdbms/admin directory, to

perform upgrade actions that do not require the database to be in UPGRADE mode:

SQL> @rdbms/admin/catuppst.sql

 16. Run utlrp.sql to recompile any remaining stored PL/SQL and Java code.

SQL> @utlrp.sql

 17. Verify that all expected packages and classes are valid:

SQL> SELECT count(*) FROM dba_invalid_objects;

SQL> SELECT distinct object_name FROM dba_invalid_objects;

 18. Exit SQL* Plus

Posted in Oracle 11g2 | Tagged | Leave a comment

Recover Gaps in Standby Database from primary Using incremental backups

Recovering a Standby database from a missing archives log

A Physical Standby database synchs with Primary by continuous apply of archivelogs from a Primary Database. In case of an archivelog gone missing or corrupt you have to rebuild the standby database from scratch but in 10g, an incremental backup created with BACKUP INCREMENTAL… FROM SCN can be used to refresh the standby database with changes at the primary database since the last SCN at Standby and then managed recovery can resume i.e. Compensate for the missing archivelogs
Step 1: On the standby database find out the current SCN.

standby > select current_scn from v$database;
CURRENT_SCN
———–
2757142742
Step 2: On the primary database, create an incremental backup from the above SCN.
#rman target /
RMAN>
BACKUP as compressed backupset device type disk INCREMENTAL fROM SCN 2757142742 DATABASE FORMAT ‘/oracle/backups/priv1/rmanbackup/manual/forstandby_%U’ tag ‘FOR STANDBY’;
Step 3: Cancel managed recovery at the standby database:
STDBY>alter database recover managed standby database cancel;
Media recovery complete.

scp the backup files to standby server to /oracle/backups/priv2/rmanbackup/manual/ folder.

Step 4: Catalog the Incremental Backup Files at the Standby Database

#rman target /
RMAN> CATALOG START WITH ‘/oracle/backups/priv1/rmanbackup/manual/’;
searching for all files that match the pattern /oracle/backups/priv1/rmanbackup/manual/

List of Files Unknown to the Database
=====================================
……

Do you really want to catalog the above files (enter YES or NO)? YES
cataloging files…
cataloging done

Step 5: Apply the Incremental Backup to the Standby Database

RMAN> recover database noredo;
Step 6: Put the standby database back to managed recovery mode.
STDBY>> recover managed standby database disconnect;
Media recovery complete
.

From the alert.log you will notice that the standby database is still looking for the old log files

*************************************************
FAL[client]: Failed to request gap sequence
GAP – thread 1 sequence ….

DBID 23623369570 branch 704397469

FAL[client]: All defined FAL servers have been attempted.

**************************************************

This is because the controlfile has not been updated.
Hence the standby controlfile has to be recreated

Step 7:  At Primary .. Create latest control file for standby database:

RMAN> backup device type disk current controlfile for standby format ‘/oracle/backups/test1/rmanbackup/manual/forstandbyctrl.bck’;

Step 8: At Standby … Create a backup (text copy) of control file (to find out the actual location of data files)

SQL> alter database backup controlfile to trace;

Step 9: At Standby …

SQL> shutdown immediate;

SQL> startup nomount;

RMAN> restore standby controlfile from ‘/oracle/backups/test1/rmanbackup/manual/forstandbyctrl.bck’;

Step 10 : At StandbyCreate standby Redo log file

For example ( check out for location , group number and size )

alter database add standby logfile thread  1 group x ‘redo log location’ size mb;

SQL>alter database add standby logfile thread  1 group 5 ‘/oracle/oradata01/test1/redo05.log’ size 52428800;

SQL>alter database add standby logfile thread  1 group 6 ‘/oracle/oradata01/test1/redo06.log’ size 52428800;

Step 11: At Standby …If there is mismatch in location of data files between primary and standby, need to update control file, follow these steps

SQL>Alter system set standby_file_management=manual;

SQL> alter database recover managed standby database cancel;

SQL>Shutdown immediate;

SQL>Startup mount

SQL>Alter database rename datafile  ‘primary data file location’ to ‘standby datafile location’;

For example:

SQL>alter database rename file ‘/oracle/oradata02/test2/data/app_data05.dbf’ to ‘/oracle/oradata/test1/data/lob/app_data05.dbf’;

Sql>alter system set standby_file_management=auto;

Sql>Shutdown immediate

Sql>Startup mount

Sql>recover managed standby database disconnect;

Step 12: Verify the standby alert log file, after couple of switch logfile at primary:

SQL> alter system switch logfile;
Posted in Data Guard | Tagged | Leave a comment

Recovering a Standby database from a missing archives log

Recover Gaps in Standby Database from primary Using incremental backups

A Physical Standby database synchs with Primary by continuous apply of archivelogs from a Primary Database. In case of an archivelog gone missing or corrupt you have to rebuild the standby database from scratch but in 10g, an incremental backup created with BACKUP INCREMENTAL… FROM SCN can be used to refresh the standby database with changes at the primary database since the last SCN at Standby and then managed recovery can resume i.e. Compensate for the missing archivelogs

Step 1: On the standby database find out the current SCN.

standby > select current_scn from v$database;
CURRENT_SCN
———–
2757142742

Step 2: On the primary database, create an incremental backup from the above SCN

#rman target /
RMAN> BACKUP as compressed backupset device type disk INCREMENTAL FROM SCN 2757142742 DATABASE FORMAT ‘/oracle/backups/test1/rmanbackup/manual/forstandby_%U’ tag ‘FOR STANDBY’;

Step 3: Cancel managed recovery at the standby database

STDBY>alter database recover managed standby database cancel;
Media recovery complete.

scp the backup files to standby server to /oracle/backups/priv2/rmanbackup/manual/ folder.

Step 4: Catalog the Incremental Backup Files at the Standby Database

#rman target /
RMAN> CATALOG START WITH ‘/oracle/backups/priv1/rmanbackup/manual/’;

searching for all files that match the pattern /oracle/backups/priv1/rmanbackup/manual/

List of Files Unknown to the Database
=====================================
…..
Do you really want to catalog the above files (enter YES or NO)? YES
cataloging files…
cataloging done

Step 5: Apply the Incremental Backup to the Standby Database:

RMAN> recover database noredo;

Step 6: Put the standby database back to managed recovery mode.

STDBY>> recover managed standby database disconnect;
Media recovery complete.

From the alert.log you will notice that the standby database is still looking for the old log files

*************************************************
FAL[client]: Failed to request gap sequence
GAP – thread 1 sequence ….
DBID 23623369570 branch 704397469
FAL[client]: All defined FAL servers have been attempted.

**************************************************
This is because the controlfile has not been updated.
Hence the standby controlfile has to be recreated

Step 7: At Primary .. Create latest control file for standby database

RMAN> backup device type disk current controlfile for standby format ‘/oracle/backups/test1/rmanbackup/manual/forstandbyctrl.bck’;

Step 8: At Standby … Create a backup (text copy) of control file (to find out the actual location of data files)

SQL> alter database backup controlfile to trace;

Step 9: At Standby …

SQL> shutdown immediate;
SQL> startup nomount;
RMAN> restore standby controlfile from ‘/oracle/backups/test1/rmanbackup/manual/forstandbyctrl.bck’;

Step 10 : At Standby … Create standby Redo log file

For example ( check out for location , group number and size )

SQL>alter database add standby logfile thread 1 group x ‘redo log location’ size mb;
SQL>alter database add standby logfile thread 1 group 5 ‘/oracle/oradata01/test1/redo05.log’ size 52428800;
SQL>alter database add standby logfile thread 1 group 6 ‘/oracle/oradata01/test1/redo06.log’ size 52428800;

Step 11: At Standby … If there is mismatch in location of data files between primary and standby, need to update control file, follow these steps

SQL>Alter system set standby_file_management=manual;
SQL> alter database recover managed standby database cancel;
SQL>Shutdown immediate;
SQL>Startup mount
SQL>Alter database rename datafile ‘primary data file location’ to ‘standby datafile location’;

For example:

SQL>alter database rename file ‘/oracle/oradata02/test2/data/app_data05.dbf’ to ‘/oracle/oradata/test1/data/lob/app_data05.dbf’;
SQL>alter system set standby_file_management=auto;
SQL>Shutdown immediate
SQL>Startup mount
SQL>recover managed standby database disconnect;

Step 12: Verify the standby alert log file, after couple of switch logfile at primary:

SQL> alter system switch logfile;

Posted in Standby database Data Guard missing archives GAP - thread 1 sequence | Tagged | Leave a comment